BusyTime Setup Guide
Authorize google to access you calendar
- The Google Code will be Red to indicate that you need to authorize google permissions in order to continue.
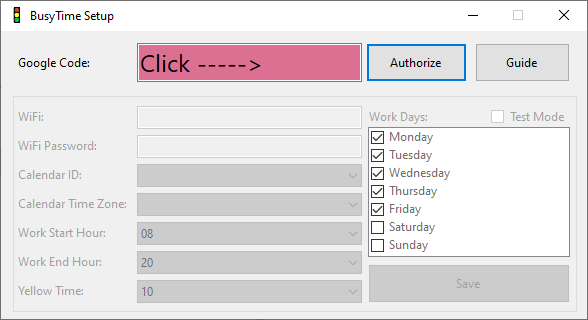
- Click Authorize
- The Google Code wwill turn Yellow while it waits for you to complete the authorization.
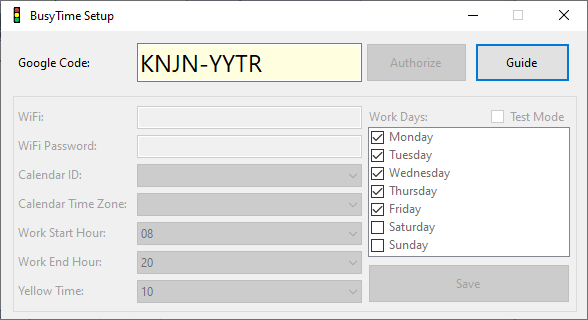
- Setup will generate a code and place it in Google Code and copy it into the clipboard.
- A browser will start up seeking permissions to your google account.
- Paste the code into the form brought up in the web browser.
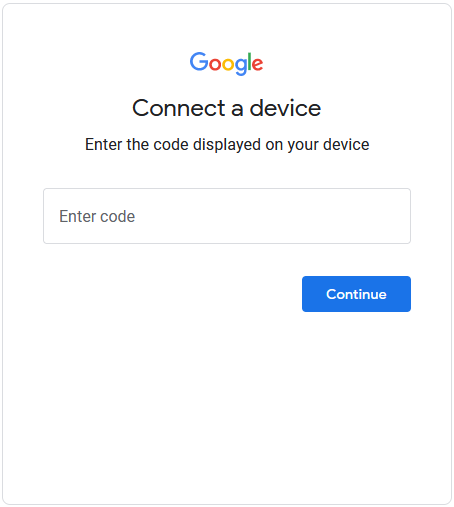
- Click through dialogs to give permissions.
- Once permission is granted successfully return to setup
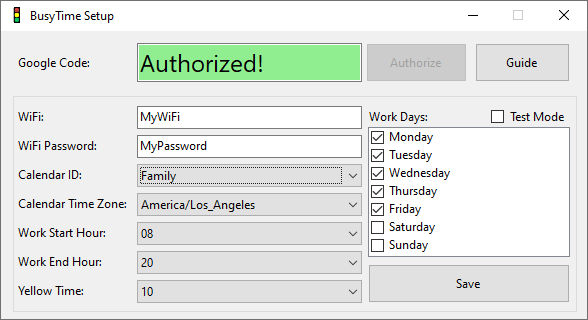
- The Google Code section will turn green indicating success.
Configure BusyTime
- WiFi: WiFi name to connect to.
- WiFi Password: WiFi password to use.
- Calendar ID: Name/ID of the google calendar to use for showing BusyTime.
- Calendar Time Zone: Timezone of the calendar.
- Work Start Hour: Hour to start reporting BusyTime (24hour).
- Work End Hour: Hour to stop reporting BusyTime (24hour).
- Yellow Time: Number of minutes to show Yellow light before a BusyTime.
- Work Days: Days of the week to check for BusyTime.